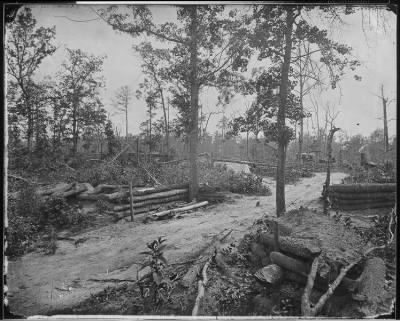
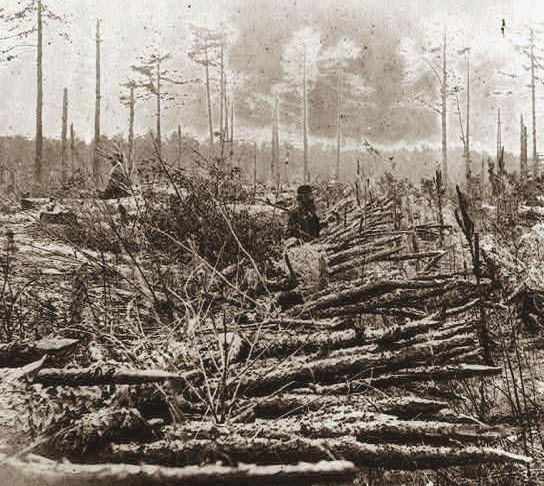
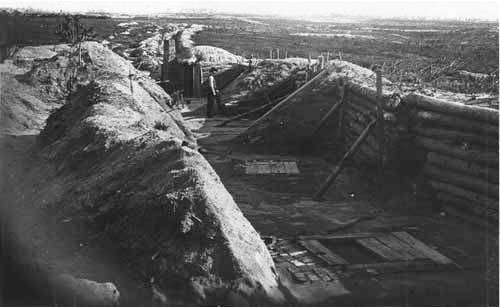
Phase #1: Find inspirationWhen planning to build 6mm field works, start with some basic research. The art of photography was growing rapidly during the American Civil War, so historians are blessed with some excellent images of both hasty and fully-developed entrenchments.
For Altar of Freedom, we are less concerned with the formidible fortress defeneses of Petersburg or Washington DC. Instead, we want to model hasty earthworks and temporary field fortifications that sprouted up in almost every battle of the war. Pictures and written descriptions confirm that soldiers often piled logs, stones, and dirt into simple mounds. Sometimes, they created an abatis with felled trees and branches. |
|

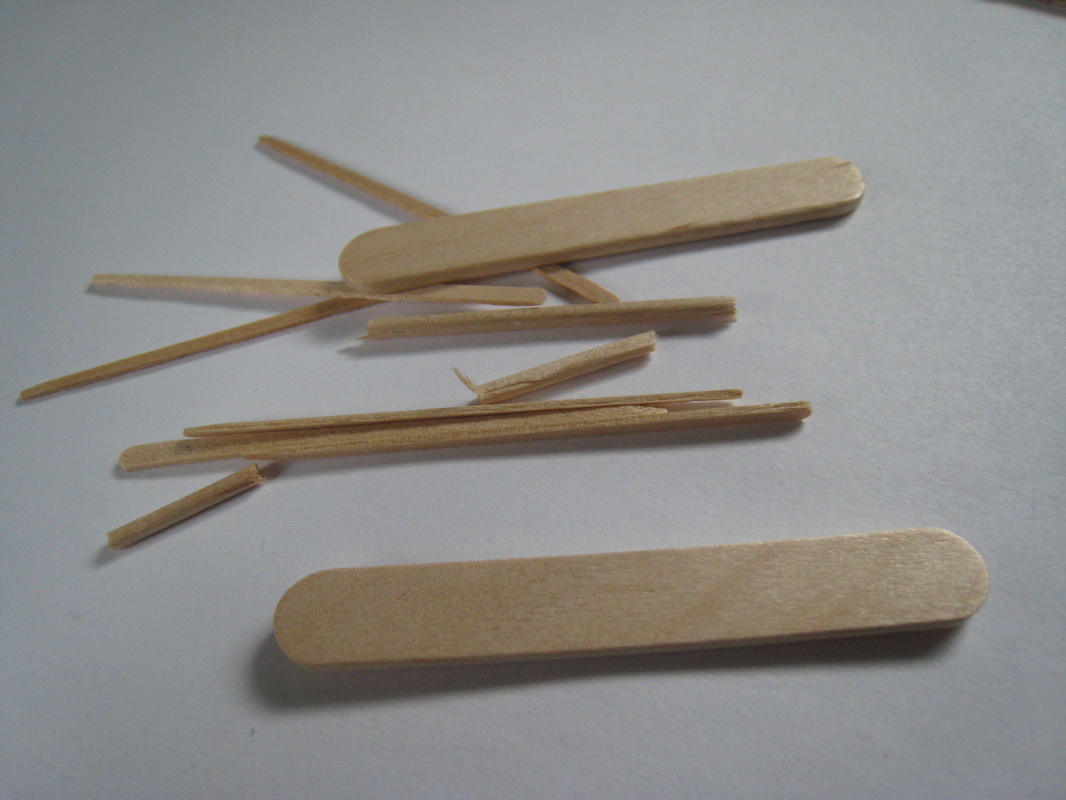
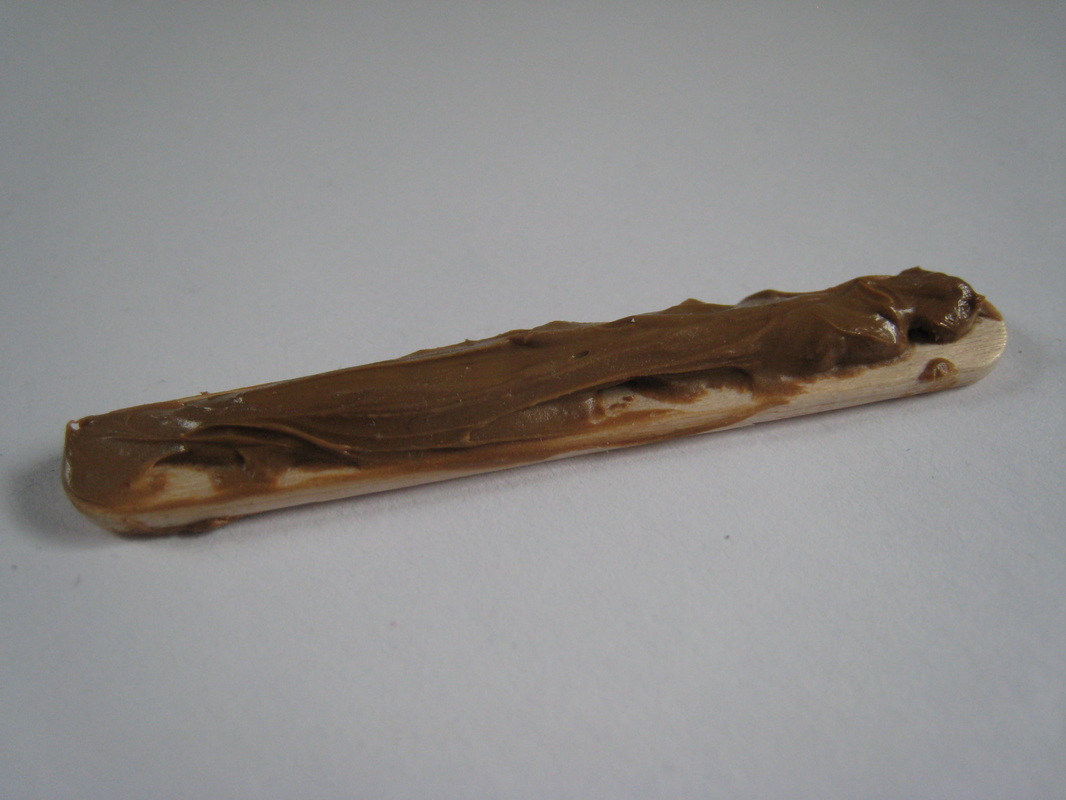
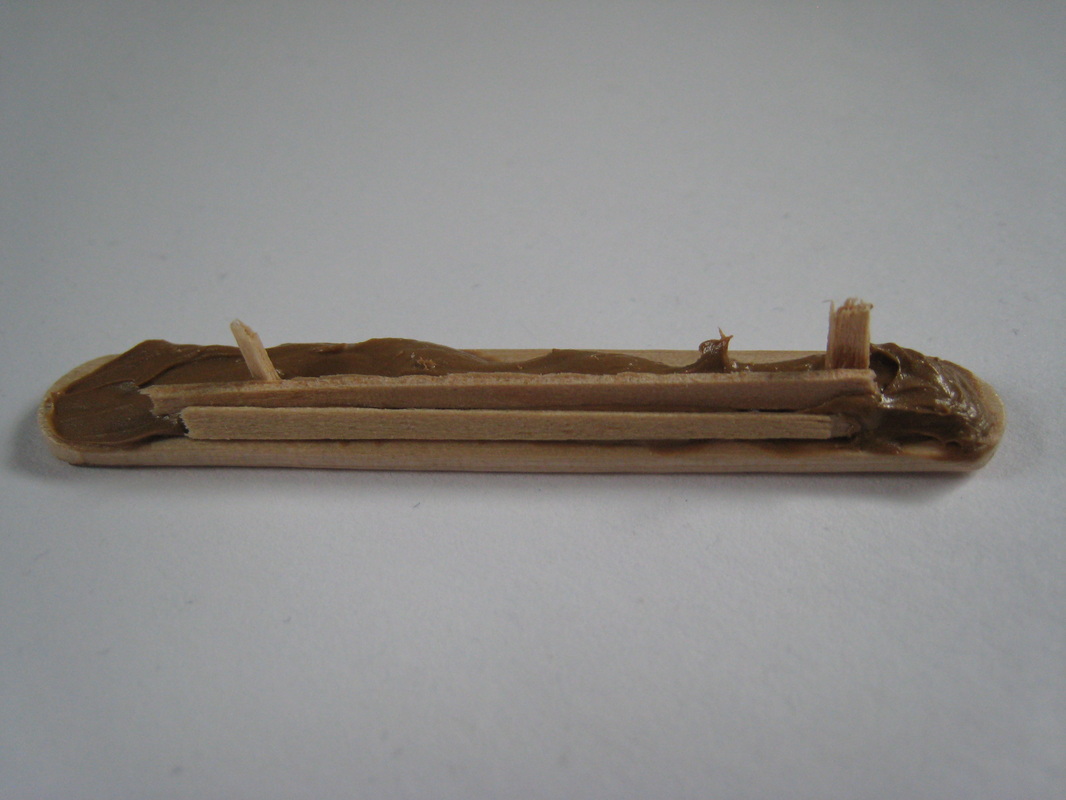
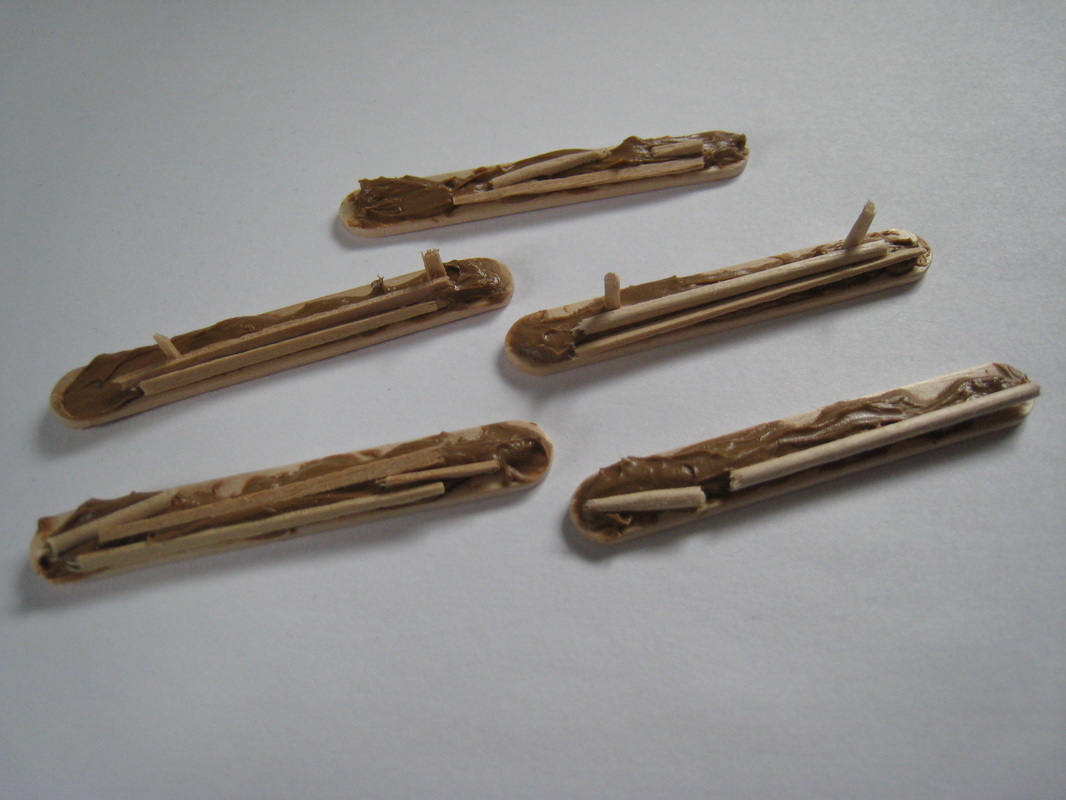
Phase #2: Building TimeMy hasty field works are based on short, 3" popsicle sticks. These are ideal because they cover the frontage of my unit bases. Using brown latex caulk--the "paintable" variety--smear a thin bead of caulk on each popsicle stick.
While the caulk is still wet, break off bits of flat and round toothpicks and press them into the caulk. You can also use small pebbles and stones. With this simple method, it's easy to make two dozen entrenchment sections in under 20 minutes. |
|
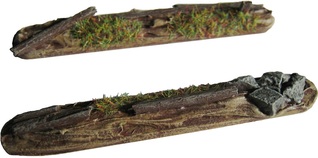
Phase #3: Paint & FlockWait 24 hours for the caulk to dry. At this stage, I like to add a few dabs of super-glue around the toothpicks and stones. This is just to make sure they don't fall out or come loose from the caulk during gaming (you know how rough gamers can be when handling little terrain pieces!).
After the glue dries, the entrenchments paint nicely. Some basic dry-brushing and a few small sections of flock go a long way. Keep in mind that grass would not have been seen on too many hasty field works, which were freshly dug soil! |
|